I posted the other day about how I love taking and editing photos and told you about some of the tricks I use to get good shots you can find the post here: Making good... GREAT
I asked if anyone who tries out Picnik (a great editing online application ) to show me their results, or if they wanted a helping hand with any editing techniques to give me a shout, well a few of you said you'd give Picnik ago and I can't wait to see some of your edits, L-plate mummy asked me how I got the specific area colour removal edit to work. So here is my walk through for you all.
So when you go to www.picnik.com you are greeted with the following screen:

you upload your photo via clicking the 'upload Photos' green button and selecting your photo file from your computer hard drive
Once your photo has loaded up onto Picnik, you will see it appear make sure you have clicked on 'Basic Edits' on the top menu bar just below where it says 'home' I have highlighted the button in red below.
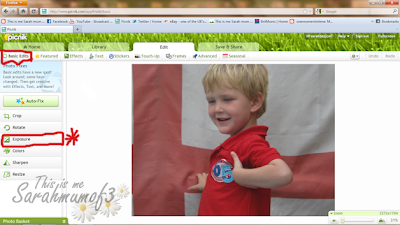
The Basic Edits are great and make such a difference, the two main ones I use are the Exposure and the sharpen, If you click on Exposure as highlighted above then more options pop out shown here:
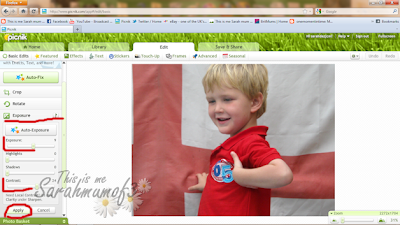
the new slider bars which appear enable you to adjust the contrast and brightness of your photo play around with these slider bars and you can improve your photos no end, sometimes only a slight tweak makes a huge difference! always remember to click 'apply' if you are happy with your edit.
The next Basic Edit I always have a look at is the 'sharpen' options, if you click on the sharpen on the menu then again you see more slider bars
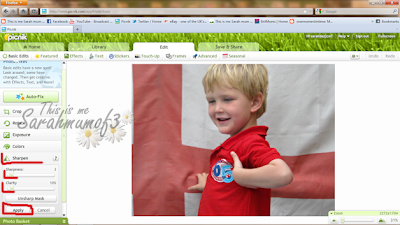 If you move the slider bars up fractionally then it improves the overall sharpness and clarity of your picture, again sometimes only a small tweak makes a huge difference, be careful not to over do an edit.
Once you have improved the photo via these basic edits you can then click on the 'effects' tab on the top menu bar, highlighted again on the below photo,
in the Effects menu there are lots of options, each one makes a huge difference to your photos.
Today I am showing you how to get the black and white effect but keep a specific area in colour, so the first thing you do is select the 'black and white' option from the menu, this turns your whole photo greyscale.
You will notice an additional box appears,if this box does not appear you can click the little paintbrush button underneath the colour selector, the box is for effect painting and has options to paint back on the original colour, so make sure that original' is selected.
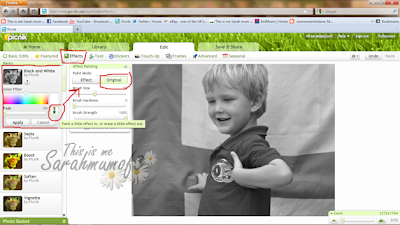
Then you simply 'paint' back in your colour on the photo, click and drag the mouse around on the area you wish to recolour, if the brush size is too large, or small you can adjust that from the effects box. If you need to 'zoom' in to get small detail use the zoom option in the bottom right corner.
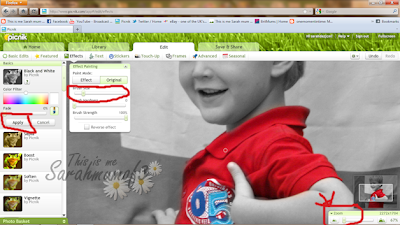
What I normally do is select a fairly larger sized brush to colour back in the main portion, then zoom in and reduce my brush size to get the detail. It may take some practise and a steady hand but its worth the practise because the end results can be amazing.

I hope this is of some use to someone, again if you do play with picnik then please share with me your edits.
This is NOT a sponsored post, nor was my 'making good.. great post' I just like to share my knowledge and help other people enjoy their photos, The edit above can all be achieved via picniks free features.
If there is any other edits you would like to know how to achieve then please get in touch.


0 comments:
Post a Comment